
Plaster Objects
Here are some examples that you can refer to for inspiration.
This is how we will make this project!
......................................................................................................................
Project Instructions::
Step One
......................................................................................................................
Project Instructions::
Step One
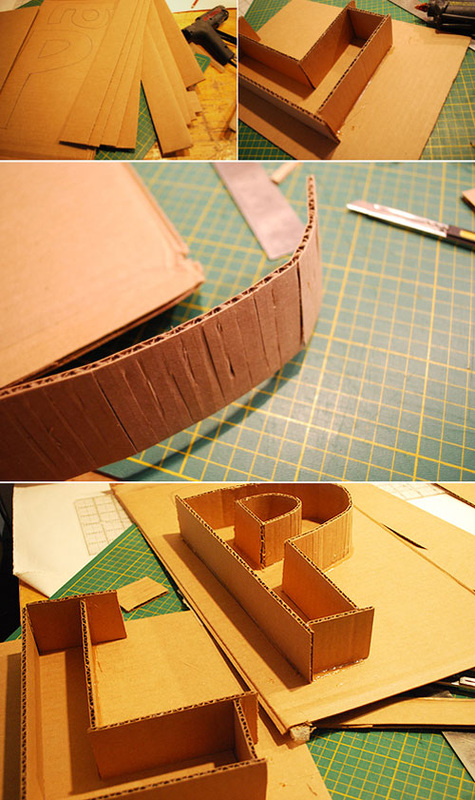
Draw your letters on cardboard. Cereal boxes are the very BEST option.
Cut strips of cardboard UP TO 2 inches high. This will be for the sides of your letter. Length of strips should be the same length as the longest side - you
want to avoid seams.
Once you have the strips cut you are ready to glue them down using your drawing as a guide. make sure when you are gluing that you overlap the corners.
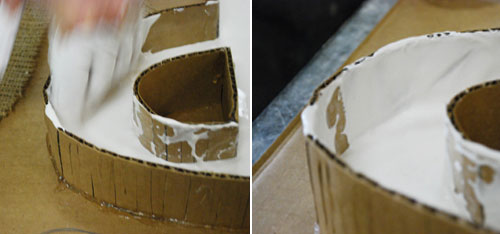
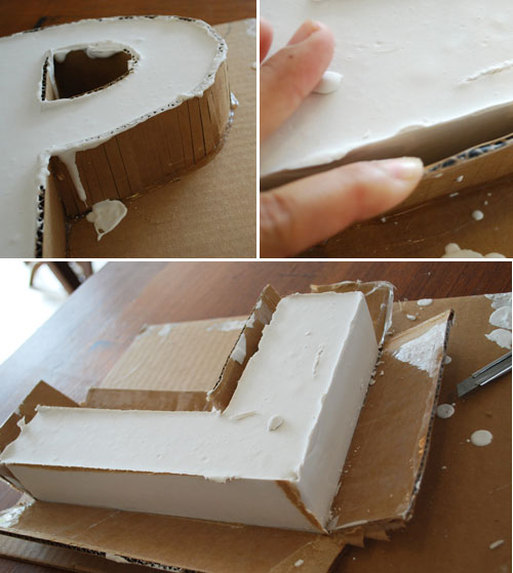
For curved shapes you can take your exacto knife and score lines to make the cardboard curve better. Feel free to use additional hot glue on edges and seams to make them stronger - always glue on the side that won't be filled with the plaster.
...................................................................................................................
step2
Cut strips of cardboard UP TO 2 inches high. This will be for the sides of your letter. Length of strips should be the same length as the longest side - you
want to avoid seams.
Once you have the strips cut you are ready to glue them down using your drawing as a guide. make sure when you are gluing that you overlap the corners.
For curved shapes you can take your exacto knife and score lines to make the cardboard curve better. Feel free to use additional hot glue on edges and seams to make them stronger - always glue on the side that won't be filled with the plaster.
...................................................................................................................
step2
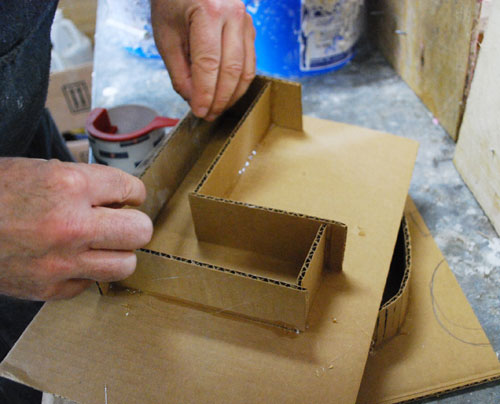
Use the clear packing tape to tape all the walls of the cardboard mold.
...................................................................................................................
step3
...................................................................................................................
step3

Take the plastic bucket and fill it with lukewarm water a quarter of the way. Proceed to add the plaster of paris to the water. Create a little mound and let sit for 1 minute to
allow the water to seep in.
stir with your hands. The consistency should be like yogurt (if the
mixture is watery it takes longer to set - if it's thicker it will set faster)
DO NOT POUR PLASTER DOWN THE DRAIN - IT WILL HARDEN AND CLOG IT UP!!!!!!!!!!!!!!
DO NOT POUR PLASTER DOWN THE DRAIN - IT WILL HARDEN AND CLOG IT UP!!!!!!!!!!!!!!!
DO NOT POUR PLASTER DOWN THE DRAIN - IT WILL HARDEN AND CLOG IT UP!!!!!!!!!!!!!!!
To clean the bucket - wait till plaster hardens and squeeze the bucket to break out the plaster.
...................................................................................................................
step4
pour the plaster mixture into the mold halfway. It shouldbe about one inch thick.
...................................................................................................................
step5
...................................................................................................................
step5
Once the plaster has set for 24 hours -
remove from the mold by cutting the cardboard with scissors or an exacto knife if neccesary.
...................................................................................................................
step6
remove from the mold by cutting the cardboard with scissors or an exacto knife if neccesary.
...................................................................................................................
step6
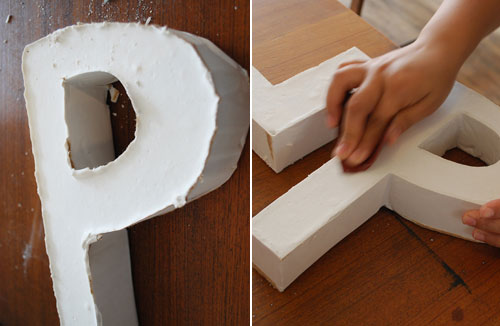
Once the cardboard has been removed use sand paper to sand and clean the edges.
...................................................................................................................
...................................................................................................................
Project Requirements ::
You must make 1-2 different molds. You can only use each hand made mold once. If you would like to use a plastic object (such as a bowl) for ONE mold you can.
Each plaster object must be painted and/or decorated.
You will select the best plaster object to turn in for your project grade.
...................................................................................................................
Standards Met ::
VA1: Media, Techniques, and Processes:
The student demonstrates understanding and can apply media,
techniques, and processes.
VA1a: The student demonstrates increasing proficiency in the production of two- and three-dimensional art forms by using a variety of materials.
